
Coastal Kitchen Remodel
When we were on the search for our home, our number one “no compromise” item was LOCATION, LOCATION, LOCATION. We knew the exact area we wanted to live in, and we were not budging on that choice. Everything else, we knew we could eventually change/add/remove. The area we were looking in is very established, so a fixer upper was inevitable. We went in with the mindset that we could make any home what we wanted it to be, and drew up a vision with each home we looked at. We laid out everything we wanted to change with each home and what it would cost us to make those changes.
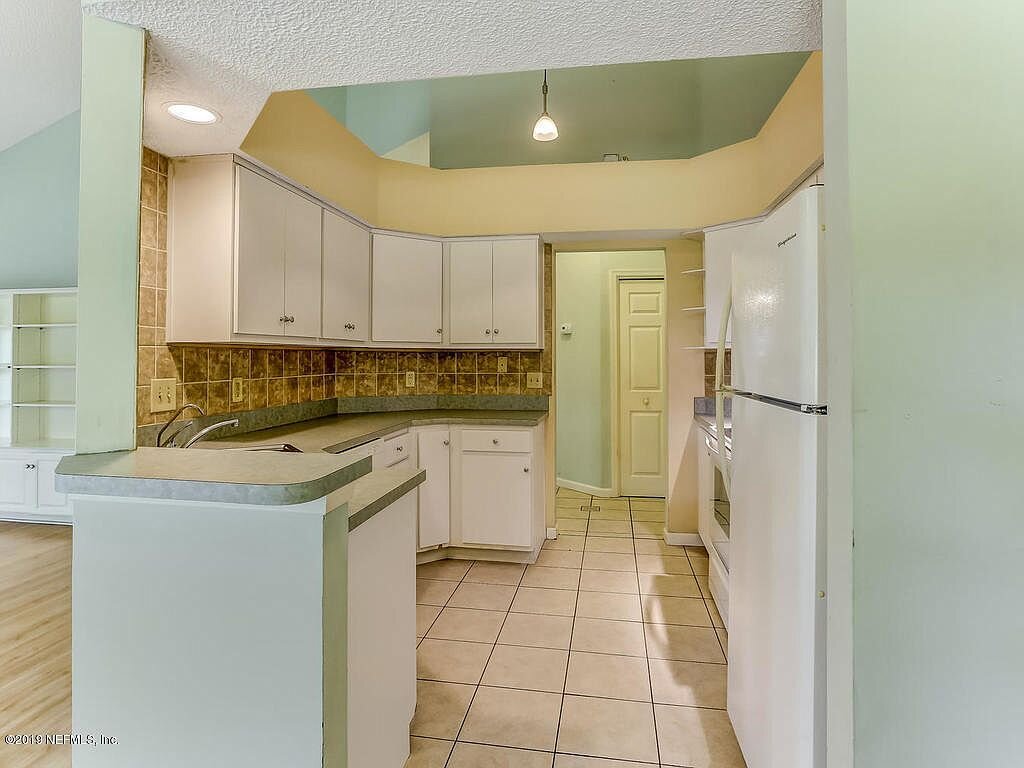
Fast forward to after making the decision on the perfect (for us) house. When we bought this house, our LEAST favorite thing was the kitchen. It was so small and compartmentalized (see below photos), but we had a vision for what it could be!
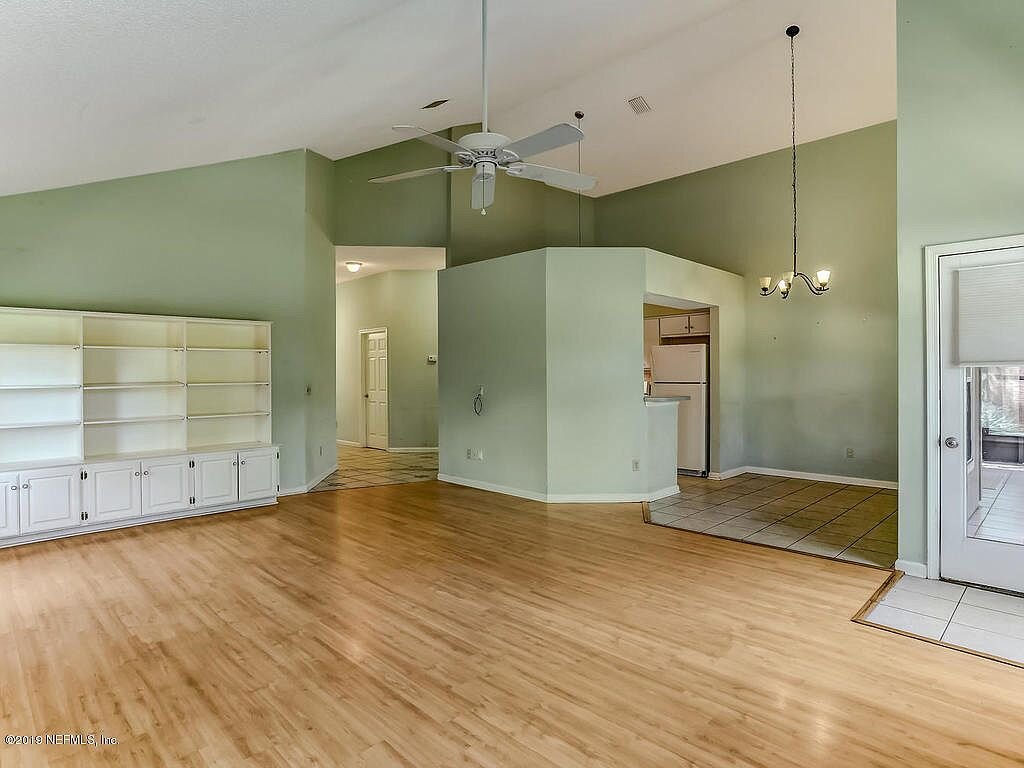
Our vision was to take the wall down completely that separated the kitchen and the living room, making the living area an open concept. In taking the wall down, it would allow space for a huge island with barstools so that the kitchen area would have more seating. We then wanted to extend the kitchen over into the dining area to allow for more cabinet space and counter space along the back wall.
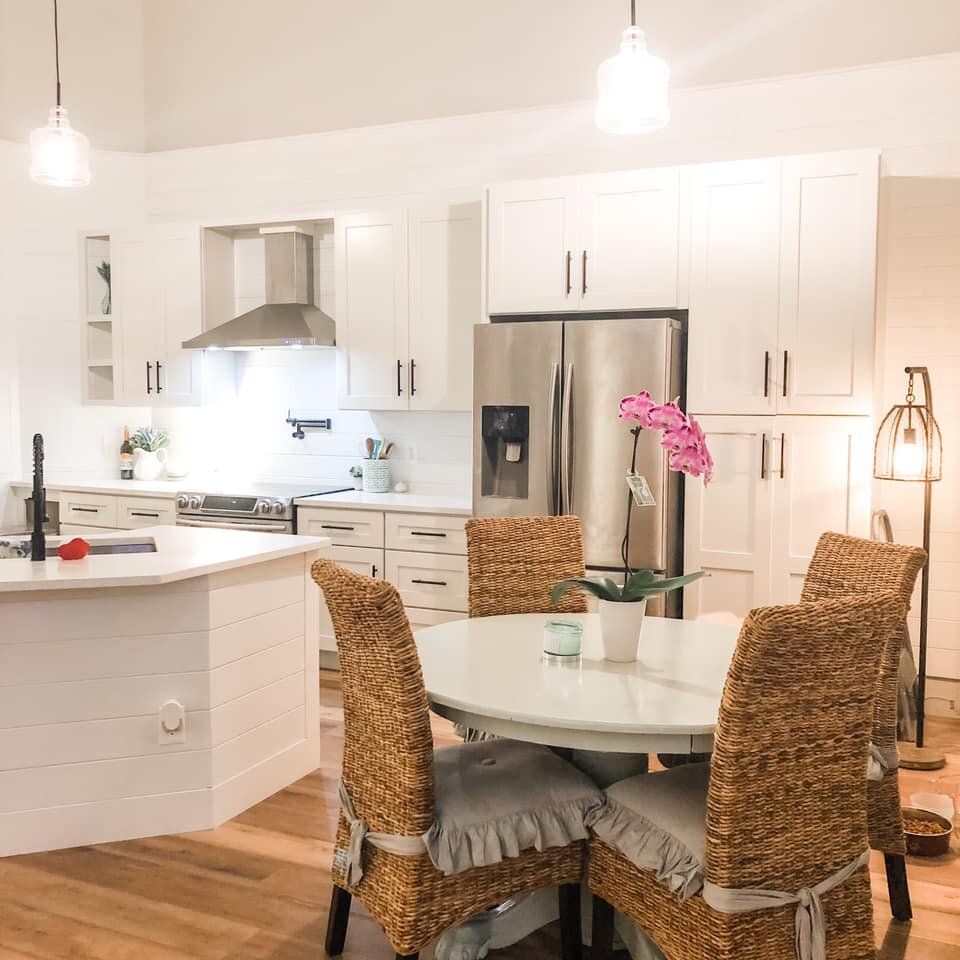
I knew I wanted white cabinets with black hardware and stainless steel appliances. I wanted to have a light, bright, airy, coastal kitchen.
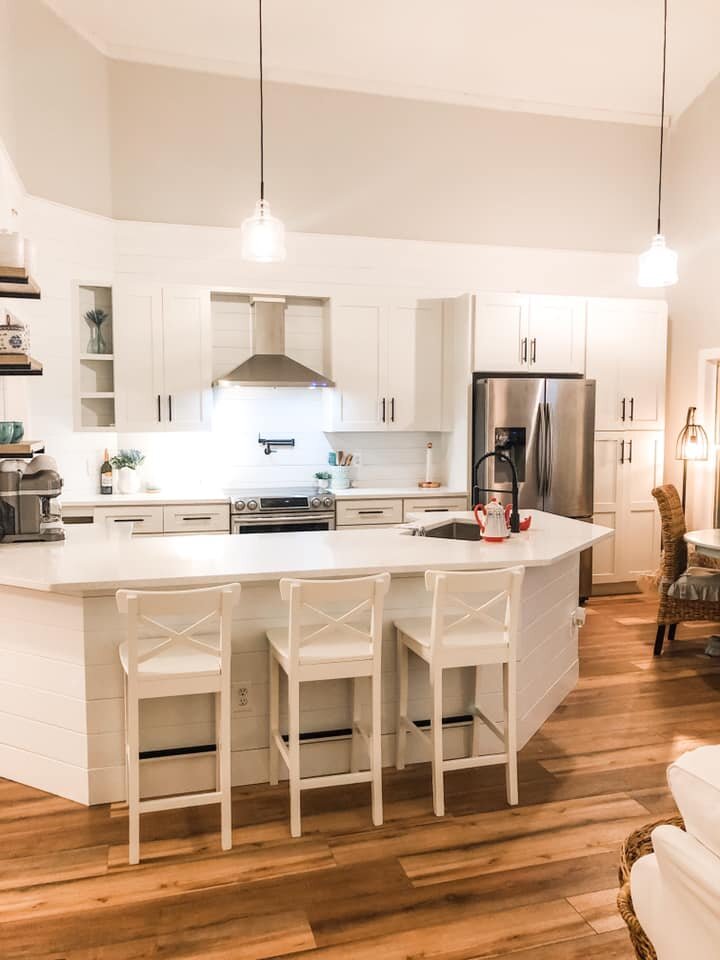
Backsplash: When we initially started the designing, I chose a sea foam color subway tile backsplash. But when it was time to make the final decision, I ended up going with shiplap to tie the kitchen in with the living area shiplap. I painted the kitchen shiplap Cloud Gray by Magnolia Home which is a very very faint gray. It breaks up the bright white just enough without having too much contrast. I am so happy I went with the shiplap, and have no regrets about it!
Hardware: I ordered the cabinet hardware, sink faucet, and the pot filler from Amazon. You can’t beat the Amazon prices or Amazon Prime shipping!
Appliances: We went with stainless steel Samsung appliances and we got them at Lowes. We did the order in store, and the ordering process was very easy. For the sink and the range hood, I ordered them both while sitting on my couch from Amazon with Prime shipping. Super easy shopping, affordable items, and they arrived quickly.
Cabinets: For the cabinets, we went with a local cabinet shop called Canopy Floors & Interiors. They came out and measured our space, I told them my exact vision for the design, I selected the cabinets style, and they placed the order. Simple, easy process.
Countertops: The countertops are a Sparkling White Quartz. I knew when selecting countertops that I wanted quartz for the timelessness and durability. We ordered the countertops through Canopy Floors & Interiors as well. The company sent someone out to measure, they quoted us the price, and then they sent someone else out to template the countertops. Two weeks later, they installed them.
Open Shelving: We got the open shelfs at Lowes. I also really loved these from Amazon.
It all started with a vision, and step by step we brought that vision to life. I should also note that my husband did every bit of this work himself. We did not hire a contractor for this project. In doing it this way, we saved a lot of money, but we lived in a construction zone for longer than we wanted too (around 2 months).
One last thing-I found it helpful to browse Pinterest and Pin, Pin, Pin all of my inspiration!
Please reach out with any questions that you have! I am more than happy to help you in any way that I can!
-Brittany